To achieve your golfing dreams, holding the golf club correctly is probably one of the most valuable technical assets.
Why having the right grip of golf club is essential for golfers?
The grip is the only connection point between the player and the golf club. The best grip enables the golfer better position and control over the clubface. It helps the golfer to hit the ball correctly and increase precision or maximize his/her distance on the game.
In this article, we’re going to show you how to grip and achieve the best golf grip.
Enjoy Reading our article how to grip a golf club!
Table of Contents
How To Grip A Golf Club : Step-By-Step guideline
A good golf grip allows you to make a free and unhabituated swing. And it ensures the clubface meets the ball square the line of flight for the straight shots.
When you grip the club, your hands should be a slight return in width. This is the natural position when your arms hang straight.
Step 1 : Position Your Left Hand
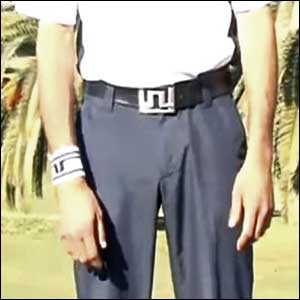
a. Let your arms hang naturally from your shoulders
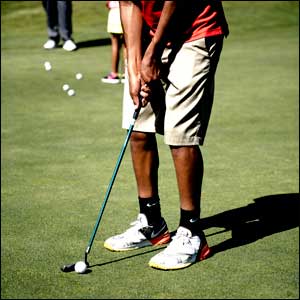
b. Place the grip of the club under the heel of your left palm.
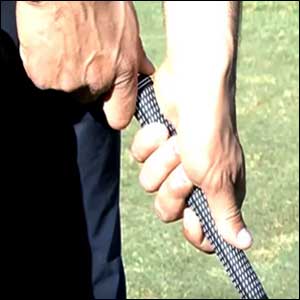
c. Then, wrap the fingers of your left hand around the grip.
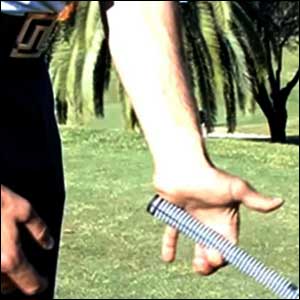
d. The heel of your palm stabilizes the club and prevents it from moving in your hands. Making the grip solid even when the hands apply on it light pressure. If you look down on your hand of the grip you should be able to see two or three knuckles, and your wrist should be at a slight angle.

e. Put your thumb on the top part of the grip. Keep it in straight.
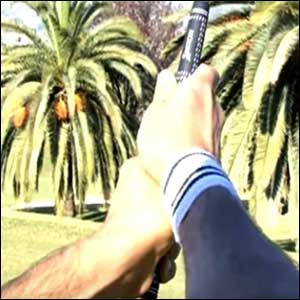
f. Do not try to stretch the palm out. Let it stabilize. This makes it easy to place your other hands.

g. You can check if you get the right grip by stretching your arm out in front of you. If your hand is in the right position, the clubface will stay square to the line of your shot.
Step 2 : Position Your Right Hand
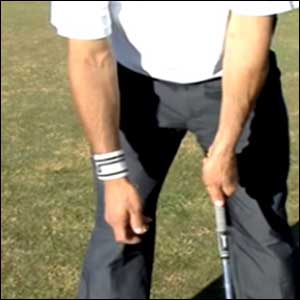
Let your right arm hang naturally in front of you.
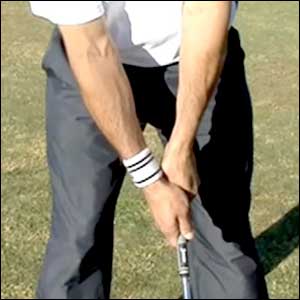
And from that position just put the hand on to the grip without pending either hands-on the grip.
Step 3 : Connect Your Hands
In general, three types of golf grips are found in golfers. These are:
- Ten-Finger Grip/ baseball grip
- Interlocking Grip
- Overlapping Grip/ Vardon Grip/ Vardon Overlap
You need to connect your hand in different ways for each grip. At this stage, we’ll explain how to master on different grips.
Ten-Finger Grip/ Baseball Grip
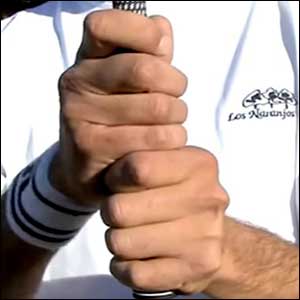
Baseball grip/ ten-finger grip
It’s one of the least preferred grips among the golf trainers. However, it has some advantages. Trainers often suggest this type of grip to the novices. This grip is useful for children and people with small hands. Players with weak, small hands or suffer joint pain or arthritis, ten-finger grip is comfortable for them.
Interlocking Grip
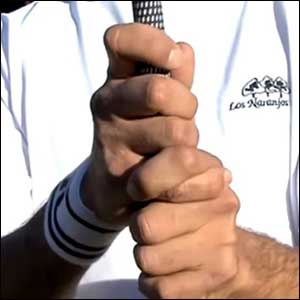
Interlock grip
Interlocking grip is very popular to those with shorter fingers. This style is beneficial for people with weak wrist and forearms, medium or average hands and novices. This grip decrease tension and excess wrist movement.
For mastering in this grip, intertwine the little finger on your non-dominant hand with the index finger on the dominant hand. The thumb of your lead hand should fit in the lifeline of the off-hand.
Overlapping Grip/ Vardon Grip/ Vardon Overlap
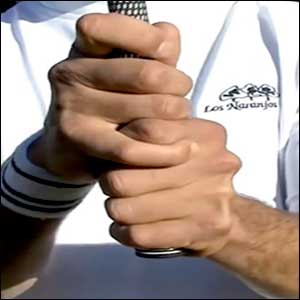
Overlapping Grip
It’s one of the most common grips among the top golfers. This grip is most likely to be taught by golf trainer. It is comfortable for people with long fingers or large hands. People with small hands may not suit this grip.
To master on this grip, place your hands on the shaft. First, take the little finger on the off hand. Then, place it between the index and middle finger on your lead/ dominant hand. Your thumb of the dominant hand should fit in the lifeline of the off hand.
Step 4 : The Thumb
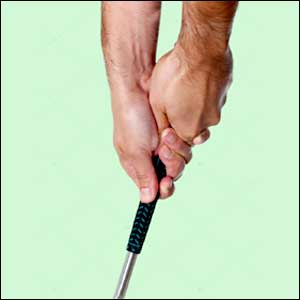
Next place your left thumb in the middle of the groove of your right hand.
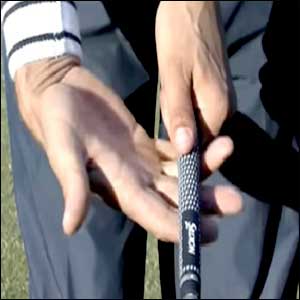
Grip the club towards the tips of the fingers, not to the base. This lets you swing the club faster.
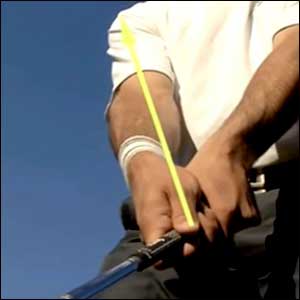
An easy way to check whether your right hand is in a good position is to look your right thumb which should be in line with your right shoulder.
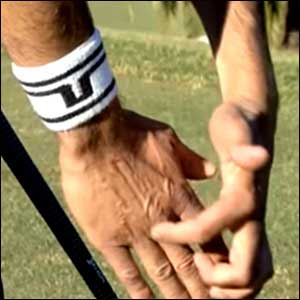
Make sure your wrist is in the straight line with your arm with your gripping. The most common mistake of gripping is to look into the hands.
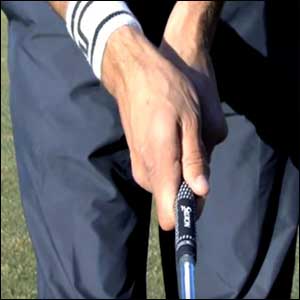
This is how a good golf grip should look.
5 Things To Avoid & 4 Effective Tips For Gripping The Golf Club
When gripping a golf club, there are some things to avoid.
The five things to avoid when gripping the golf club are-
#1 Positioning The Club Very High In The Palm
Avoid positioning the club very high in the dominant hand through the palm. This position will limit golfer’s ability to use his/ her wrist efficiently. It also makes it very difficult to create a good wrist set in the golf swing.
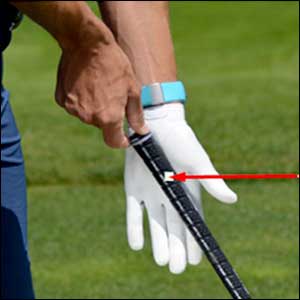
The palm
Tips 1: Your grip should be a little lower in your hand. As a result, it runs crosswise beneath your heel pad through the base of your forefinger. At this position, your wrist will get much freedom to move. It also helps you to make squaring the clubface easier.
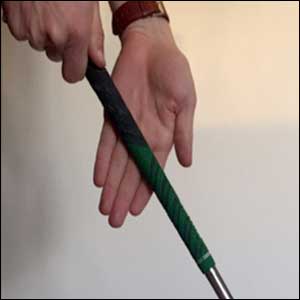
Heel Pad
#2 The Deep Interlock
Deep interlock isn’t actually necessary to hold the golf club. In fact, sometimes this deep grip tends to cause problems. The deep interlock happens when golfer places his/her forefinger and little finger very deeply and takes his/ her hold with palms facing outwards. It also causes clubface and wrist problems.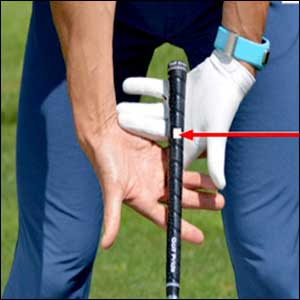
Deep Interlock
Tips 2: You should start with your palms facing each other. First, practice baseball grip or 10-finger grip so that your hands remain in a more natural position. When you feel it comfortable, you can start overlock or interlock grip.
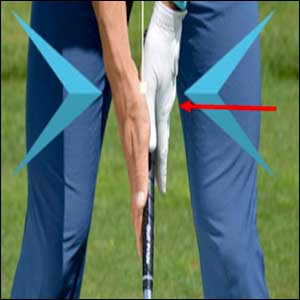
Palm facing
#3 Weak off (non- dominant) Hand
This is the position when the hand is very far over to the right for a left handed player. At this position the “V” between the forefinger and thumb points more to the right shoulder. For left handed player, this is vice-versa. It has negative impact when it comes to producing consistency and power.
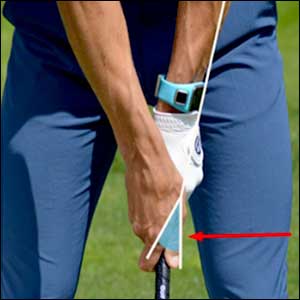
Tips 3: If you’re right handed, place your off hand on the side of the golf club. As a result your “V” will be pointing more to your dominant hand shoulder. It’ll help you to produce a “perfect & stronger” clubface from here. It’ll also help you to producr a consistent and good down swing.
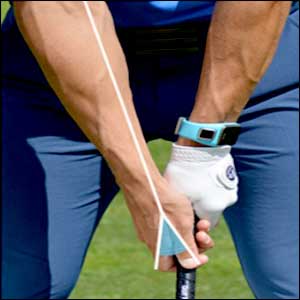
#4 Holding The Club Very Far Up The Grip
It’s a common mistake that do most of the newbie. Holding the club very far up the grip results in a loss of control. It also causes shots to come out of the heel of the club.
Tips 4: Leave one inch between the end of the club and the top of your grip. Many club comes with a mark on the grip that shows where your bottom thumb should go. If you grip slightly further down the shaft, it’ll help you to improve your consistency.
#5 EXERTING EXCESS PRESSURE
If you grip the club very tightly, you’ll feel tension in your forearm at address. It’ll stop you to carry out a full shoulder turn. It happens to all players, if they play under pressure.
Tips: To overcome this problem, focus on soft hands. Also avoid to grip the club very tightly. Waggle the club at address. This action will help you to reduce tension.
Conclusion
In conclusion, there is no wrong or right way of linking your fingers. The three types of grips used by professional golfers, depend on personal preference as well as hand size.
If you change your style of golf grip, first time it’ll be uncomfortable to you. However, you should stick with it.
Remember!
The right golf is the foundation of becoming a great golf player.
Hope, this step-by-step guideline on how how to grip a golf club be helpful to you.
Practice and be efficient.
Happy golfing!
More Resource About Golf:
Hey very interesting blog!